The NUbots robots must be able to detect object in their environments so they are able to play soccer. We use machine learning to detect where objects are in the world. To find out more about our vision system, head over to the vision page.
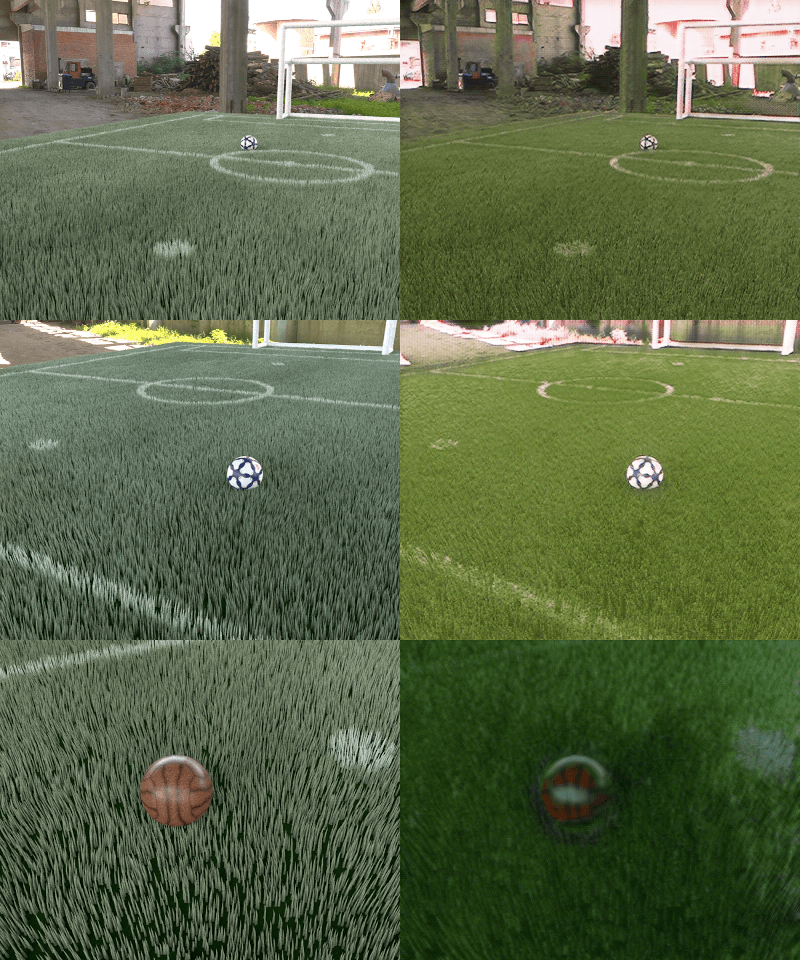
Machine learning often requires data to train on. Rather than take thousands of pictures and annotate them by hand, we use advanced techniques to generate the data. NUpbr is used to generate semi-synthetic images with corresponding segmentation masks. These datasets are limited by their synthetic nature. To try to bridge this gap, we use a modified version of CycleGAN to generate realistic images from NUpbr images.
GANs
A Generative Adversarial Network (GAN) 0 is a machine learning technique developed in 2014 which aims to create new data based on the given training data. A GAN consists of a generator and a discriminator. The generator creates fake data and the discriminator classifies the data as real or fake.
A Cycle-Consistent Adversarial Network (CycleGAN) 0 performs unpaired image-to-image translation. CycleGAN is based on image-to-image translation GAN (pix2pix) 0. The main difference between these two GAN models is that CycleGAN uses unpaired data while pix2pix uses paired data. CycleGANs translate some domain A to another domain B, and vice versa. It uses four networks.
| Network | Description |
|---|---|
| Generator A | Transfers an image from the A domain to the B domain. |
| Generator B | Transforms an image from the B domain to the A domain. |
| Discriminator A | Determines if a given image is from the A domain. |
| Discriminator B | Determines if a given image is from the B domain. |
During training, the generators will receive images from the dataset pool for their respective domain. The output of these will be fake images. The fake images are fed into the other generator.
The CycleGAN also uses an identity mapping to stabilise the training. It will input a real A image into the B generator, which should give back the original real A input. This is also done for real B images into the A generator.
The Model
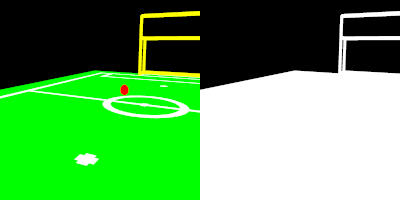
This implementation of CycleGAN uses photographs and NUpbr paired raw and segmentation images. The NUpbr raw images represent the A domain of the CycleGAN. The photographs represent the B domain of the CycleGAN. We train the model on photographs and NUpbr images to obtain a dataset of fake photographs.
For a given NUpbr raw image, we will also load in the corresponding NUpbr segmentation image into the model. We set the non-black (not background) pixels of the segmentation image to white and ensure the black is true black, to produce a black and white image. The black portions of the image represent '0' and the white portions of the image represent '1', which forms our attention mask.

After we get a fake photograph, we use the attention mask to add back in the original background.
masked_fake_B = fake_B*attention + real_A*(1-attention)fake_B*attention will give us the non-background pixels of the fake photograph. real_A*(1-attention) will give us the background pixels of the original NUbpr image. Adding these both together, we get the fake non-background elements and the real background elements in one image. This result is then used for training. This removes the consideration of the background from the training, and instead lets the generator focus its attention on the non-background elements.
Since we do not have an attention mask for images in the B domain, we focus more on cycling on the original real A image. From a real B image, we generate a fake A image. We do not cycle from here. From a real A image, we cycle on the resulting fake B image, and then again on the resulting cycled fake A image. All the cycles from the real A image can use the attention mask from the corresponding segmentation mask for A.
The repository contains a pre-trained base model that will map semi-synthetic soccer field images to real soccer field images. This model can then be fine-tuned to a specific field by training from the base model with a dataset of real images of a specific field. When training is run, without specifying to continue an existing fine-tuning trained model, the pre-trained base will be loaded.
Using NUgan
Prerequisites
This code has been tested on Windows with Anaconda and Linux Mint.
Clone the repository
git clone https://github.com/NUbots/NUganMove into the cloned repository
cd NUganYou can use either CPU or NVIDIA GPU with latest drivers, CUDA and cuDNN.
If you are using Windows, we recommend using Anaconda.
On non-Windows OS you can use the provided shell script to install dependencies in Anaconda.
sh scripts/conda_deps.shTo set up with Anaconda on MacOS you can create a new environment with the given environment file
conda env create -f environment.ymlIn Windows, use the batch file rather than the environment file.
"./scripts/conda_deps.bat"To set up with pip run
sudo apt install python-pippip3 install setuptools wheelpip3 install -r requirements.txtTraining
You will need to add a dataset. Datasets can be found on the NAS, in the 'CycleGAN Datasets' folder.
The dataset folder must contain three folders for training. These are
| Folder | Contents |
|---|---|
| trainA | Contains training images in the Blender semi-synthetic style. |
| trainA_seg | Contains the corresponding segmentation images for the Blender images. |
| trainB | Contains training images in the real style. |
Note that semi-synthetic images and segmentation images should have matched naming (such as the same number on both images in a pair). This ensures they pair correctly when sorted.
Start the Visdom server to see a visual representation of the training.
python -m visdom.serverOpen Visdom in your browser at http://localhost:8097/.
Open a new window. In Windows, run
"scripts/train.bat" <GPU_ID> <BATCH_SIZE> <NAME> <DATAROOT> <CONT> <EPOCHCOUNT>In other OS, such as Linux, run
sh scripts/train.sh <GPU_ID> <BATCH_SIZE> <NAME> <DATAROOT> <CONT> <EPOCHCOUNT>The options are as follows
| Option | Description | Default |
|---|---|---|
| GPU_ID | ID of your GPU. For CPU, use -1. | 0 |
| BATCH_SIZE | Batch size for training. Many GPUs cannot support a batch size more than 1. | 1 |
| NAME | Name of the training run. This will be the directory name of the checkpoints and results. | The current date prepended with 'soccer_' |
| DATAROOT | The path to the folder with the trainA, trainA_seg, trainB folders. | ./datasets/soccer |
| CONT | Set to 1 if you would like to continue training from an existing trained model. NAME should correspond to the name of the model you are continuing to train. This does not include the base model, which is loaded if CONT is 0. | 0 |
| EPOCHCOUNT | The epoch count to start from. If you are continuing the training, you can set this as the last epoch saved. | 1 |
In most cases you will not need to add any options.
Training information and weights are saved in checkpoints/NAME/. Checkpoints will be saved every 20 epochs during training.
Testing
Testing requires testA, testA_seg, and testB folders.
| Folder | Contents |
|---|---|
| testA | Contains test images in the Blender semi-synthetic style. |
| testA_seg | Contains the corresponding segmentation images for the testA Blender images. |
| testB | Contains test images in the real style. |
In Windows run
"scripts/test.bat" <GPU_ID> <NAME> <DATAROOT>In other OS, such as Linux, run
sh scripts/test.sh <GPU_ID> <NAME> <DATAROOT>The options are as specified in the Training section, with the exception of the default value of NAME, which is soccer_base.
The results will be in results/NAME/test_latest
Generating
Generating requires a single generateA folder that contains Blender semi-synthetic images.
In Windows run
"scripts/generate.bat" <GPU_ID> <NAME> <DATAROOT>In other OS, such as Linux, run
sh scripts/generate.sh <GPU_ID> <NAME> <DATAROOT>The options are as specified in the Testing section.
The output will be in results/NAME/generate_latest.
Examples

Acknowledgements
This code is based on yhlleo's UAGGAN repository, which is based on the TensorFlow implementation by Mejjati et al.. This code accompanies the paper by Mejjati et al. 0.
This work is based on the work by Zhu, Park, et al. along with the implementation at junyanz's pytorch-CycleGAN-and-pix2pix.
The pretrained base model was trained on public real images from BitBots ImageTagger 0.
References
No references have been cited on this page yet.

